Thursday, July 30, 2009

How to hang a TV

Those of you that have a flat panel LCD TV (or plasma) probably love it, but it can be tricky to find a good and safe location for the TV to reside permanently. We have had ours in several houses and used several configurations (most people outside of "WitPro" would not experience this...).

For this house we inherited a 2X4 frame made to fit the "media niche" the builder in the 1990s decided was all the bigger a TV would ever be... ~30"


Our mounting bracket is different than the predecessor so we had to add two more vertical boards to mount onto using the lag bolts

The mounting of the bracket was performed on the ground, once the whole unit was ready to go into the niche we used 8 screws on each side to mount - over engineered, but worth it not to be concerned about the TV falling on us or the kids.

And here it is in the final state as it is today.

Tuesday, July 28, 2009

The Formal

Here are some action shots of the floor going down...


hmm, that does not fit quite right... Just get in there, would ya...

This room will not be my favorite, not a simple rectangular corner in it, but atleast the remaining rooms we have plans to Erngyneer the floors are nice big rectangles!!!


Here are some close-ups of some seams and precision cutting for the air vent.


Glad all the cutting was complete before the triple digit temps hit us, 107?!? UGH!


Wednesday, July 22, 2009

Isle of Tile - part II

In this episode we will have a look at some techniques for cutting through thick hardwood.
If you recall, the tile has been removed from the island and we have one slab of butcher block that runs the length of the island, 74"X25" and now we need to cut two pieces 37"X12.5" to cover the remaining portion of the island. Now you might ask yourself, why two pieces, well we have a piece left over from counters we did back in Colorado and if it is cut to length and then ripped exactly in half it leaves us with the coverage we need.

There is now only isle and no tile, whew!


So after some attempts to use our table saw to rip the butcher block it was determined that the table was not wide enough so we have to create our own jig and use the circular saw.

Fortunately there was some lumber left here that was straight enough to use as a guide. Note to first time jig makers: take care to plan which side of the saw you will be guiding against where "waste" and physical attributes of the saw are concerned. e.g. you might set you jig to guide on the left edge of the saw, but find that since the motor is there you can not actually operate the motion of the cut. As our circular saw has its "waste" cut to the right much care had to be taken to ensure that the offset was correct when guiding from the right side.
Now if you have never cut 1 1/2 thick hardwood before, maple in our case here, you probably can not just zip through the entire thickness without stalling the saw or worse - if you can you have MUCH better tools than we.
So the strategy used is to cut 1/4" depths until completely through the wood:
{1/4", 1/2", 3/4", 1", 1-1/4", 1-1/2"} now I must confess that normally after getting to 1" making the jump to the full depth seems to work, I discovered this the first time out of error.

Here are some close ups of the channel being cut and the jig/saw horse setup also...


The big cuts are made so we took the pieces into the kitchen to do a fit check...

Now below you can see the the ends must be cut to length and the same process as before was followed. Right side jig and ~10 cuts later both pieces are the length we need.


Next a handheld jigsaw was employed to round off the outer corners.

And then some extra plywood was used to create a little shade
and it worked great until the Wind came along...

And now something completely different...
Barely visible is our newest tool, the router, a 3/8" roundover bit is being used and all of the external top lips of the counter, whenever possible a jig was used to eliminate depth error.


And another dry fit after routing is complete.
Still some finish work to complete and attaching the counter, to be concluded...

and next up is the aforementioned dining room
look at those angles...

Calico Road


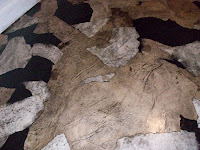
Here is a hallway done with a paper faux floor covering technique...

This looks like an expensive Italian slate, but the materials were purchased at Michaels and Home Depot. Dilly was unavailable for comment as to whether the pattern was copyright infringement on her coat.

Thursday, July 16, 2009

Isle of Tile - part I

We will start this off with demolition of the tile surface and a cautionary tale....
Meet the white ceramic tile surface. Now you might be thinking, oh how nice pretty and clean; well you'd be wrong... this is a nightmare to clean!!!
So we are getting rid of it, plain and simple.
Now prying the tile off was not too bad and that got us down to the cement board below.
All but the corner edges, which were very difficult to get off in one piece.
And in case you did not know, when ceramic tile breaks, the edges are VERY sharp - razor sharp.
So keeping this in mind gloves and safety glasses were worn, but Old Man Erny forgot his "safety" sandals... Oops, OUCH, "bleeding like a stuck PIG" came to mind, such a clean cut it really did not hurt, but was sore for many days afterward. LiquidBandage (aka medical grade superglue) was useful in "stitching the wound together and controlling the bleeding. So please learn from this mistake and wear proper footwear when remodeling.
On with the Island demo... Here you can see the cement board, which was held in place by
mortar and nails. I would say that unlike the poor design choice of the tile, the tile work was professionally done, which made the demo take much longer than anticipated. By now you may be wondering, what is with the "lovely" carpet... well it came from the formal dining room, which is next to get the Erngyneered wood floors and
we needed something to keep the cement board from flying around when it was being pried up. a box of tile...

isn't that some nice carpet... maybe for someone else...

Now, here is what was under all the tile and cement board...
This is after scrapping off mortar, vaccuuming, rinse repeat until smooth and then we sanded some just for good measure...
we have some work to do on the edge here:

to be continued...